Installing Mould-DRY
Mould-DRY installation: simply mount, plug in and dry

Mould-DRY installation: simply mount, plug in and dry

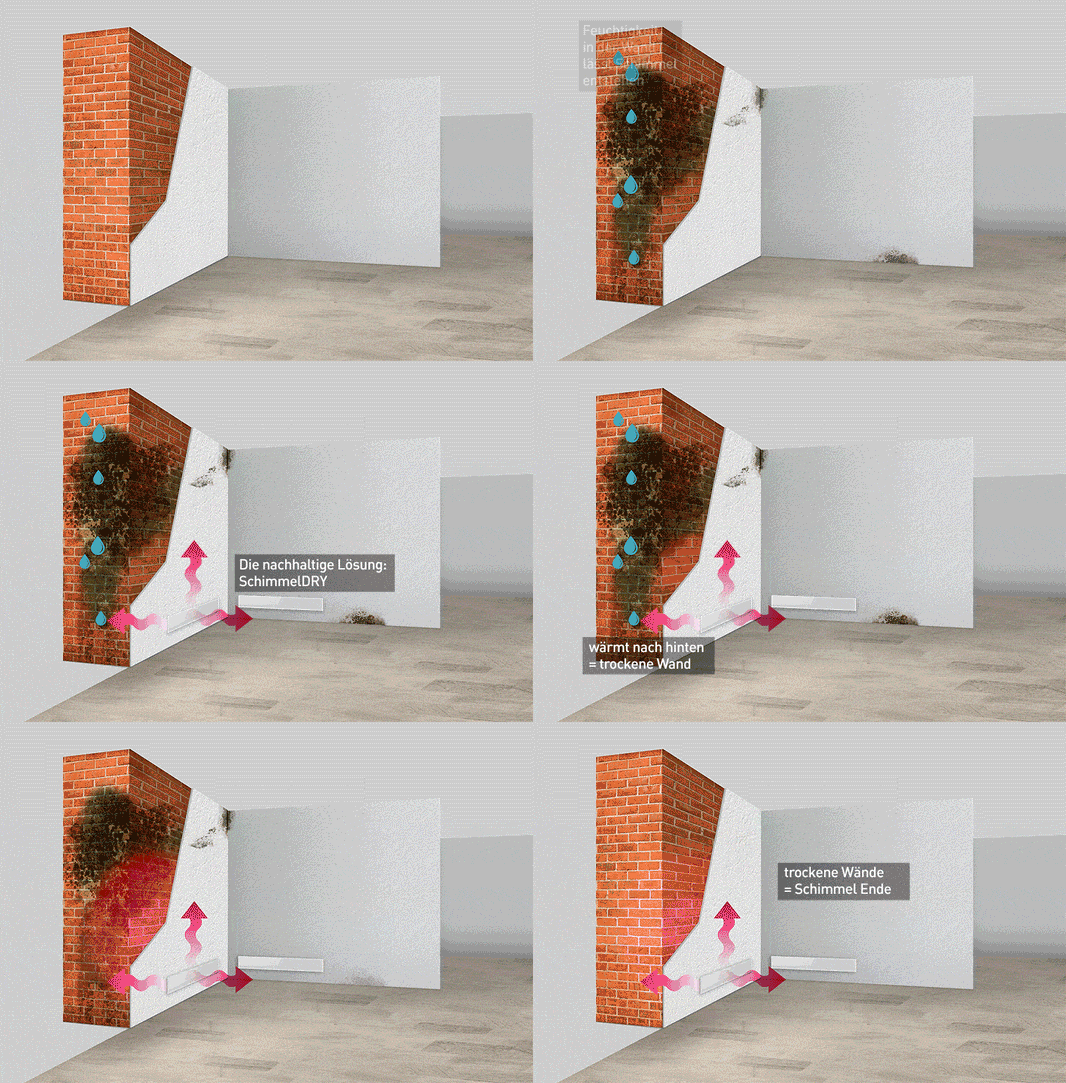
Mould-DRY combines straightforward installation with long-term, chemical-free wall drying. You can choose whether to mount the module directly on the affected wall or position it flexibly in front of the wall using the supplied support feet. In either case, Mould-DRY is connected to a power supply and directs heat into the masonry. Rather than merely concealing the visible problem, it reduces moisture within the wall – the underlying cause of mould growth – over the long term.

Wall mounting or support feet: how to install Mould-DRY correctly

Mould-DRY combines straightforward installation with long-term, chemical-free wall drying. You can choose whether to mount the module directly on the affected wall or position it flexibly in front of the wall using the supplied support feet. In either case, Mould-DRY is connected to a power supply and directs heat into the masonry. Rather than merely concealing the visible problem, it reduces moisture within the wall – the underlying cause of mould growth – over the long term.

Mould-DRY, Moulddry and Mould-Dry all refer to the same system: a quiet, maintenance-free solution for the targeted drying of moisture-affected wall areas – without chemicals, sprays or short-term surface treatments.

Wall mounting or support feet: how to install Mould-DRY correctly

Two installation options are available for Mould-DRY. For a permanent position, choose wall mounting. The installation kit includes two wall plugs and screws for attaching the module directly to the affected wall. This option is ideal if the space in front of the wall needs to remain clear and Mould-DRY can stay permanently in place.

Mould-DRY

Wall mounting

Alternatively,Mould-DRYcan be positioned in front of the wall using the supplied support feet. This flexible option allows the module to be placed without permanent installation. It is also suitable for rented accommodation where permanent fixing is not desired. The installation method is less important than ensuring that Mould-DRY is positioned in front of themoisture-affected area of the walland can remain continuously connected to a power supply.

Mould-DRY

Support foot

Once mounted or positioned, the module is simply plugged in. Mould-DRY initially runs continuously so that targeted heat can transport moisture outwards through the wall and reduce it. TheHow Mould-DRY workspage explains infrared wall drying in detail.

Installing Mould-DRY
Installation & operation

Positioning Mould-DRY correctly and operating it safely

Position Mould-DRY directly in front of the affected area of the wall without covering the panel with textiles. A clearance of 2 to 3 cm between the module and furniture or curtains is sufficient. This space allows air to circulate in front of the panel and prevents objects from touching the unit. Do not position the module near water sources: it is splash-resistant, but not completely waterproof.

Installing Mould-DRY
Installation & operation

Operating time, coverage and power consumption of Mould-DRY

How long Mould-DRY needs to operate depends on the moisture level within the wall. After initial start-up, drying can take from several weeks to several months. The first effects may become visible after only a few days; in many affected areas, it takes around 4 to 6 weeks for the mould to die off through drying so that it can be removed. Mould-DRY can then continue operating for shorter periods using a timer to keep the wall dry.

Step by step

Installation instructions

Positioning

Do not position Mould-DRY directly next to furniture or curtains. A clearance of 2–3 cm is sufficient.

Air circulation

Do not cover the panel with textiles, as this will restrict airflow.

Temperature

Mould-DRY can reach surface temperatures of approximately 70°C, which does not pose a fire or burn hazard.

Splash protection

Do not position Mould-DRY near water sources. The unit is splash-resistant, but not completely waterproof.

It’s that simple

Unpack, plug in & live mould-free!

INSTALL

Simply position it in front of the affected wall using the support feet, or mount it directly on the wall using the two wall plugs and screws included in the installation kit.

PLUG IN

Plug in Mould-DRY and initially leave it running continuously. The drying time varies depending on the moisture level within the wall and may take from several weeks to several months during initial operation.

LIVE HEALTHIER

Once the wall has dried, you are free from the negative effects of mould. Mould-DRY can continue to keep the wall dry with shorter operating periods controlled by a time

How many Mould-DRY modules do I need?

Length of the affected wall
3 m
Move the slider to set the length of the affected wall.
Severity of mould growth

Select the severity of the mould growth.

Required modules

0
The calculation is based on the severity and length of the affected wall.
Remove mould now
Effective removal – fair & safe.
FAQ

Frequently asked questions & answers

How difficult is Mould-DRY to install?
  • Installation is designed to be plug-and-play and requires no specialist knowledge or structural alterations. Mould-DRY is either attached to the wall using two wall plugs and screws or positioned on the supplied support feet in front of the affected area. The unit is then plugged into a socket. It is important to maintain a clearance of 2 to 3 cm from furniture and curtains and to position the unit away from water sources.
How long does Mould-DRY need to run after installation?
  • Mould-DRY should initially run continuously. The exact duration depends on how damp the wall is when operation begins. The first changes may become visible after only a few days, while complete drying can take several weeks or months. For many areas of mould growth, it takes approximately 4 to 6 weeks for the mould to die off through drying. Shorter operating periods controlled by a timer can then help keep the wall dry.
How many Mould-DRY modules do I need for my wall area?
  • The number of modules required depends on the length of the affected wall and the severity of the mould growth. The M1 base module can be combined with up to four M2 extension modules. This allows Mould-DRY to be adapted to affected wall areas of different sizes. The relevant measurement is the actual length of wall affected by damp or mould, not the total size of the room.
How much electricity does Mould-DRY consume?
  • A Mould-DRY module uses 45 to 50 watts and is designed to operate continuously during the initial drying phase. Monthly electricity costs are less than €13. The heat is directed specifically into the wall rather than being used merely to warm the room air. This helps reduce moisture within the wall over the long term, addressing the underlying cause of the problem.
Is Mould-DRY safe to use around children and pets?
  • Mould-DRY operates entirely without chemicals and produces no harmful fumes. The unit is silent and maintenance-free. As its surface temperature can reach approximately 60 to 70°C, the panel must remain unobstructed, must not be covered with textiles and should not touch furniture or curtains directly. A clearance of 2 to 3 cm is sufficient.
Where can I find customer experiences and reviews of Mould-DRY?
  • Customer experiences and reviews are not part of the installation instructions, but they may help when choosing an installation method. The Mould-DRY customer experiences page contains relevant information about using the system. The installation process always remains the same: choose wall mounting or support feet, position the unit correctly, plug it in and begin drying.
No matching question found.

Would you like advice by phone?

Our service team is available by phone and will help you find the right solution for damp and mould.

📞 +43 4212 46715 Mon–Thu | 09:00–16:00 • Fri | 09:00–16:00